
PREMIUM CONCRETE COATINGS for LASTING STRENGTH and BEAUTY
The Concrete Solutions team are experts in both interior and exterior concrete coatings, epoxy flake flooring and stone floor restoration. We bring modern, high-performance concrete coating solutions to homes and businesses, combining sleek aesthetics with long-lasting durability. Whether you're upgrading your garage, workspace, or outdoor patio, we deliver clean finishes and professional results built to last.
OUR SERVICES

EPOXY FLAKE INSTALLATION
CONCRETE, TERRAZZO & STONE FLOOR POLISHING

OUTDOOR CONCRETE RESTORATION

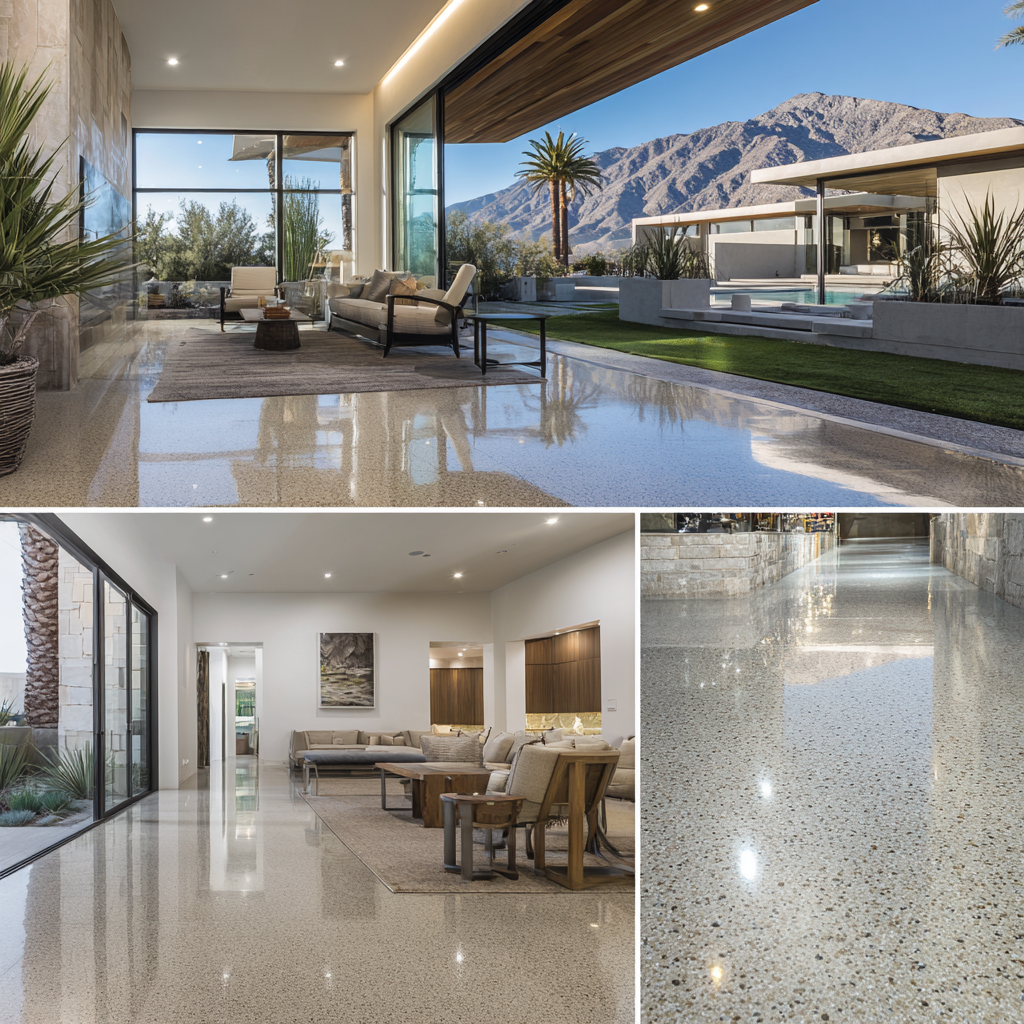
CONCRETE POLISHING

Understanding the Concrete Polishing Process

1. Initial Prep & Inspection
Before any polishing begins, the surface is carefully examined. Old flooring (like carpet or tile), adhesives, coatings, or debris must first be removed. Any cracks, pits, or joints in the slab are then repaired.
Sometimes, a test—or mock-up—on a small area is recommended so the contractor and homeowner can review the expected outcome before the full job begins.
2. Grinding with Coarse Diamond Abrasives
The actual polishing begins with heavy-duty grinding machines fitted with coarse diamond segments. These steps flatten the surface, eliminating blemishes, coatings, or uneven areas.
3. Honing: Smoothing the Surface
After the rough grind, finer diamond abrasives (resin-bonded) are used in a honing phase. These smooth out scratch marks left by coarser grits and gradually begin to reveal a subtle sheen in the concrete.
4. Densifying the Concrete
A key technical step is applying a densifier, which penetrates the porous concrete, strengthening it from within. This improves durability, reduces dusting, and ensures the surface can take on a high polished finish.
5. Polishing to Shine
Once the concrete is solidified and smooth, polishing continues with increasingly finer grits, ranging from a matte glow to a mirror-like shine.
6. Sealing and Final Protection
After polishing, a sealer or guard is applied to enhance protection against stains and wear, and to make maintenance easy.
CALL 760-285-6691
to schedule a quote
EPOXY/POLYASPARTIC FLAKE FLOORING
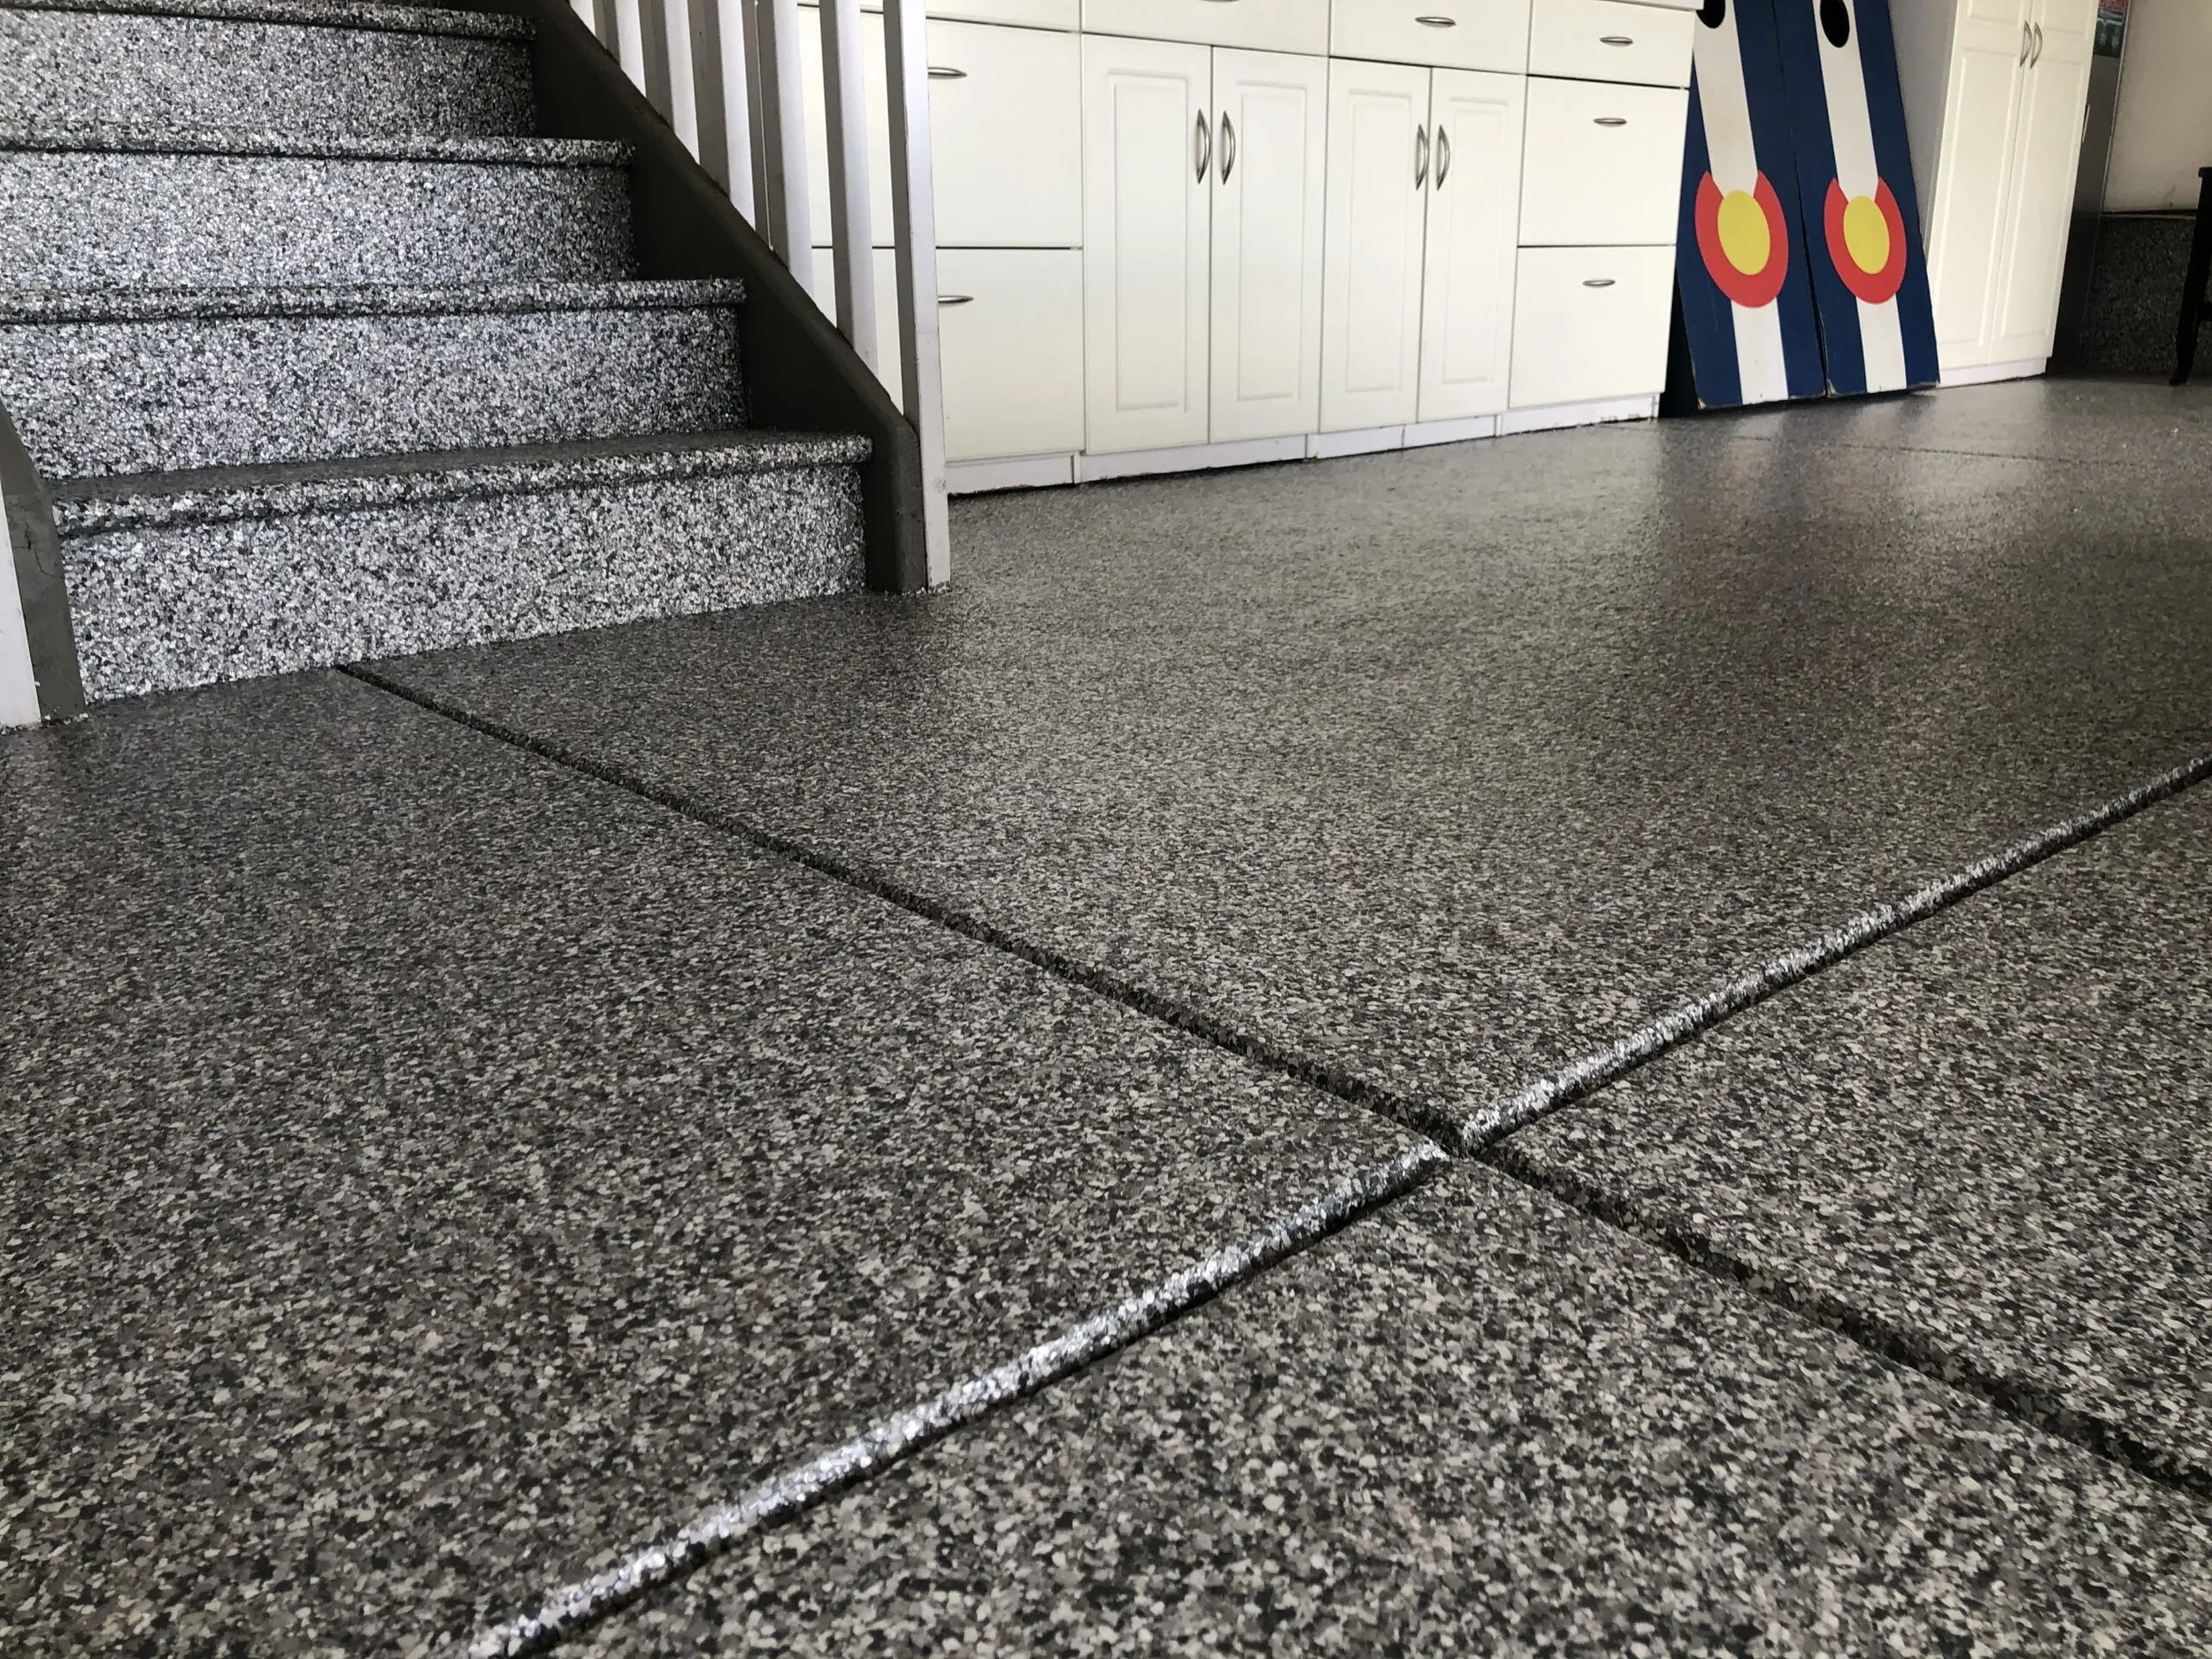
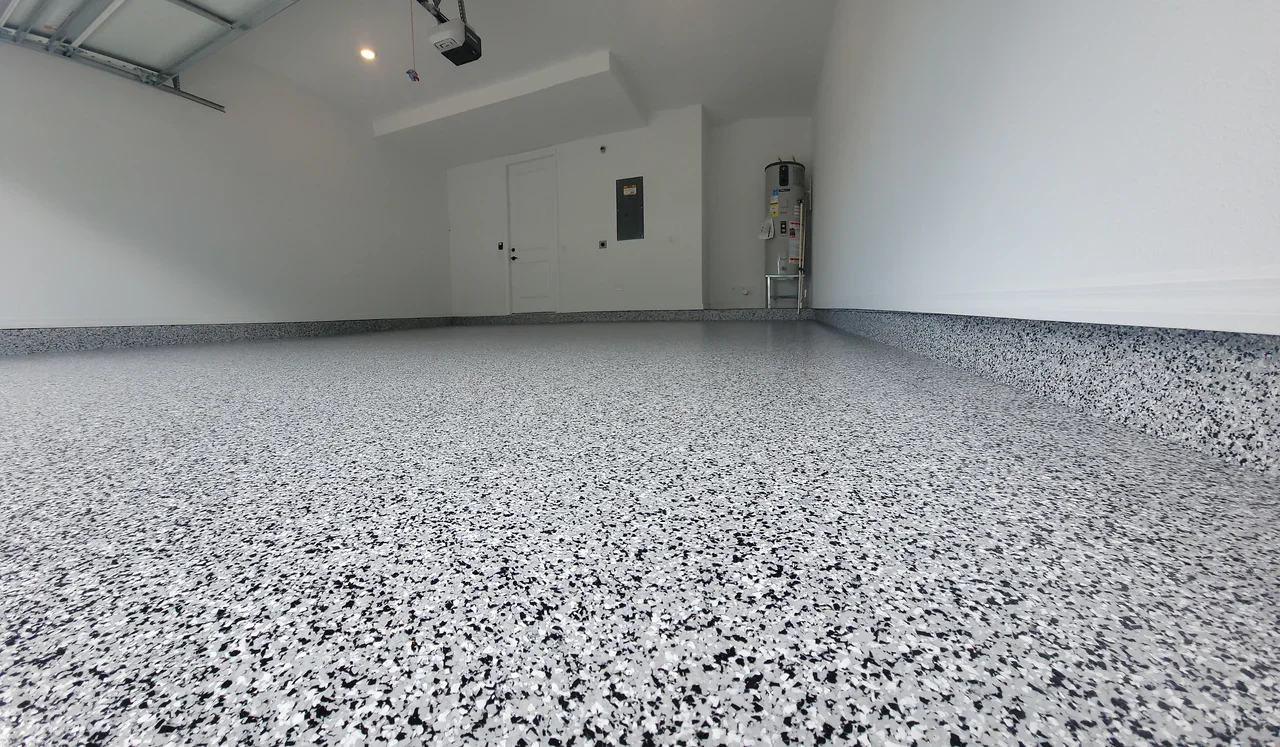
Concrete Epoxy Flake Floor Installation What to Expect
An epoxy flake floor is a decorative, highly durable flooring solution that combines industrial-strength epoxy resin with colorful vinyl flakes. This type of flooring is popular in garages, commercial spaces, showrooms, and even parts of homes because it’s attractive, long-lasting, and easy to clean. Below is a clear, step-by-step overview of the process so you know exactly what will happen in your space.
1. Initial Assessment & Preparation
Before any work begins, the installation team will evaluate your floor’s current condition. They’ll check for:
Cracks, pits, or damage that may need repair.
Moisture issues that could affect adhesion.
Previous coatings or sealers that must be removed.
Preparation is one of the most important steps—without a properly prepared surface, even the best epoxy will not bond well.
Surface grinding: Using industrial diamond grinders, the team will remove the top layer of concrete to create a slightly rough, NEW porous surface.
Repairs: Any cracks or holes are filled with a concrete patching material, smoothed, and allowed to cure.
Cleaning: The floor is thoroughly vacuumed to remove all dust and debris.
2. Base Coat Application
The first layer applied is the epoxy base coat, which acts as both an adhesive and a foundation for the flake system.
The base coat is typically a 100% solids epoxy resin mixed with a hardener.
It’s rolled or squeegeed onto the floor evenly, ensuring complete coverage.
This coat penetrates the concrete surface, locking in the bond.
3. Flake Broadcasting
While the base coat is still wet, decorative vinyl flakes are evenly broadcast across the floor.
These flakes come in a variety of colors and sizes, allowing you to customize the look of your floor.
The installer will throw (or “broadcast”) them until the floor is completely covered—this is called a “full broadcast,” ensuring no bare spots.
Aside from creating a decorative finish, flakes help hide imperfections and add slip resistance.
4. Curing Period
The floor is left to cure—typically overnight, depending on temperature and humidity. During this time:
The base coat hardens.
The flakes lock into the surface.
It’s important that no one walks on the floor during this stage.
5. Flake Removal & Smoothing
Once cured, the excess loose flakes are removed.
The surface is scraped with special tools to knock down any sharp edges.
All loose flakes are vacuumed away.
The goal is to create a smooth, even texture while keeping the decorative flake layer intact.
6. Topcoat Application
The final step is applying a clear protective topcoat, often made of polyaspartic, polyurethane, or UV-stable epoxy.
This coat seals the flakes in place, creating a durable, stain-resistant, and easy-to-clean surface.
Polyaspartic topcoats cure faster than epoxy and are more resistant to sunlight, making them ideal for areas exposed to UV rays.
The topcoat is what gives the floor its glossy finish and long-lasting durability.
7. Final Curing & Use
After the topcoat is applied:
Light foot traffic is usually possible within 24 hours.
Heavy items or vehicles should wait 48–72 hours, depending on the product used.
Once fully cured, your floor will be:
Seamless (no grout lines or joints to trap dirt).
Chemical-resistant (safe against oil, gasoline, and cleaning agents).
Easy to clean (a simple mop or broom is usually enough).
Attractive (custom colors and finishes to match your space).
Why Preparation and Quality Matter
The quality of an epoxy flake floor depends on three things:
Surface preparation – If the concrete isn’t properly ground, the coating may peel or bubble over time.
Material quality – Industrial-grade epoxies and topcoats last much longer than budget-grade products.
Professional application – Correct mixing ratios, spreading techniques, and curing times ensure a flawless finish.
What to Expect During Installation
Noise & Dust: Grinding creates some noise and dust, though professional installers use vacuums to minimize mess.
Odor: Some coatings have a mild odor during application, but ventilation helps dissipate it quickly.
Timing: Most installations take 1–2 days, depending on the floor size and condition.
Long-Term Benefits
An epoxy flake floor:
Extends the lifespan of your concrete.
Adds value to your property.
Resists stains, impacts, and abrasion.
Maintains its appearance for many years with minimal maintenance.
CALL 760-285-6691
To Schedule a Quote


POOL DECK RESURFACING COLORING and SEALING
Understanding the Pool Deck Concrete Cool Deck Knockdown Process
1) Initial Assessment
The first step is evaluating the condition of your existing concrete. If your deck is in good structural shape—free of major cracks, spalling, or severe deterioration—the surface can usually be refinished directly.
Inspection: The contractor will walk the area to identify any repairs needed before applying the new coating.
Repairs: Minor cracks or pitted spots are patched with a compatible concrete repair compound.
Cleaning: The entire surface is deep-cleaned, often with a pressure washer, to remove dirt, grease, old coatings, and other contaminants. This ensures proper adhesion of the new texture.
In some cases, the surface may also be lightly ground or etched to create a better bonding profile.
2) Masking and Protection
Before any coating is applied, nearby walls, landscaping, pool coping, and fixtures are carefully masked or covered with plastic and tape. This prevents overspray and keeps your property clean during the process.
3) Base Coat Application
A specialized acrylic or polymer-modified coating is mixed according to the manufacturer’s specifications.
Bond Coat: This is applied as the first layer, acting like a primer for the concrete. Its job is to anchor the texture material securely to the surface.
The coating is often sprayed or troweled evenly across the deck to establish a consistent base color and ensure uniform coverage.
4) Knockdown Texture Application
This is the defining stage of the process. The goal is to create a surface that’s slip-resistant, visually appealing, and cooler to walk on.
Spray Texture: Using a hopper gun, the coating material is sprayed onto the surface in small splatters.
Knockdown Technique: After allowing the texture to set briefly, the contractor “knocks down” the high points with a steel trowel. This flattens the peaks into a smooth-yet-textured finish.
The result is a patterned surface with subtle dimples and ridges that break up heat retention and add traction without feeling rough on bare feet.
5) Colors and Design Options
Cool deck knockdown finishes can be customized to match the style of your home or business. You may choose:
Solid colors to coordinate with surrounding features.
Two-tone effects for added depth.
Patterns or borders for a more decorative appearance.
Color pigments are either mixed directly into the coating or applied as an integral stain after the texture is in place.
6) Sealing the Surface
Once the texture and color are complete, a protective sealer is applied.
Purpose of Sealer: It locks in the color, protects against UV fading, and resists water, chlorine, and other pool chemicals.
Depending on the product, the sealer can provide a matte or satin finish.
This step is crucial for extending the life of the finish and making it easier to clean and maintain.
7) Curing and Dry Time
Our cool deck knockdown coatings are fast-curing, but full strength is achieved over time.
Light Foot Traffic: Often allowed within 24–48 hours.
Pool Use: Typically after 2 days, depending on weather conditions.
8) Maintenance
One of the advantages of a cool deck knockdown finish is its low maintenance needs.
Routine Cleaning: Sweeping or rinsing away dirt and debris will keep it looking fresh.
Periodic Pressure Washing: Helps remove algae or sunscreen build-up.
Resealing Every Few Years: Keeps the surface protected and looking vibrant.
9) Benefits of a Knockdown Finish
Cooler Surface Temperature: Reflects sunlight and dissipates heat, making it comfortable to walk on in hot weather.
Slip Resistance: The textured surface reduces the risk of slips and falls, especially in wet areas.
Durability: Designed to handle heavy foot traffic, pool chemicals, and changing weather conditions.
Aesthetic Appeal: Transforms plain or aging concrete into a fresh, decorative surface.
Cost-Effective Renewal: Avoids the need for complete concrete replacement while giving the look of a brand-new deck.
CALL 760-285-6691
To Schedule a Quote

At Concrete Solutions, we specialize we specialize in transforming worn concrete and stone flooring into clean, durable and visually stunning surfaces. With over 15 years of experience, we bring professionalism and pride to every project… residential, commercial and industrial.